Mosquito nets are essential items in any home looking to keep unwanted insects at bay while allowing fresh air to circulate.
These protective nets, also known as mosquito nets, are an effective solution to prevent mosquitoes, flies and other flying insects from entering the house. In this article, you will learn how to make mosquito nets, from window nets to bed nets, as well as tips on maintaining and making them.

Keep Mosquitoes Out: Window Screen Net for a Bug-Free Home
In the never-ending battle against mosquitoes and other unwanted insects, window screens are your best ally. These simple but effective barriers provide a reliable defense to keep these winged intruders out of your home, allowing you to enjoy the fresh air and breeze without worry.
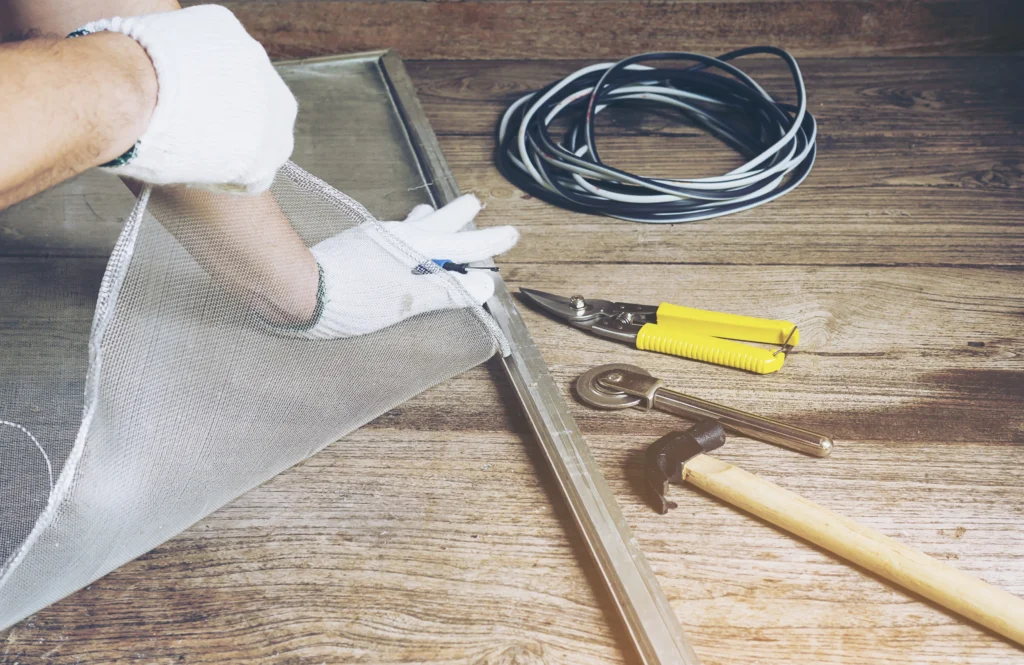
Materials to make a window mosquito net:
- Mosquito net
- 4 wooden slats (measure your window to fit perfectly)
- 4 flat corner brackets with their screws
- 4 hooks
- Industrial stapler
- Paint (Optional)
- Squad
- Universal pliers
Find everything you need to make your own mosquito nets and keep these annoying insects at bay.
No se han encontrado productos.
No se han encontrado productos.
Step by step: How to make a window mosquito net
1.Measure your window and cut the 4 wooden slats to make a rectangle of the same size.
2.In the corners place the 4 flat supports and join them with the screws (help yourself with the square so that they are straight)
3.If you want you can paint it
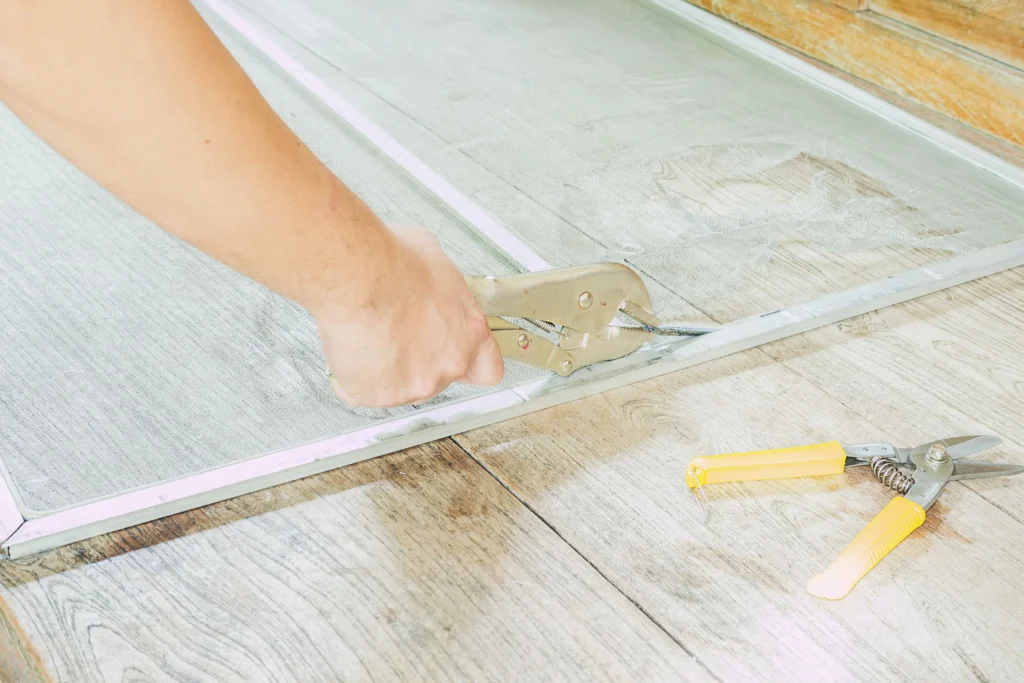
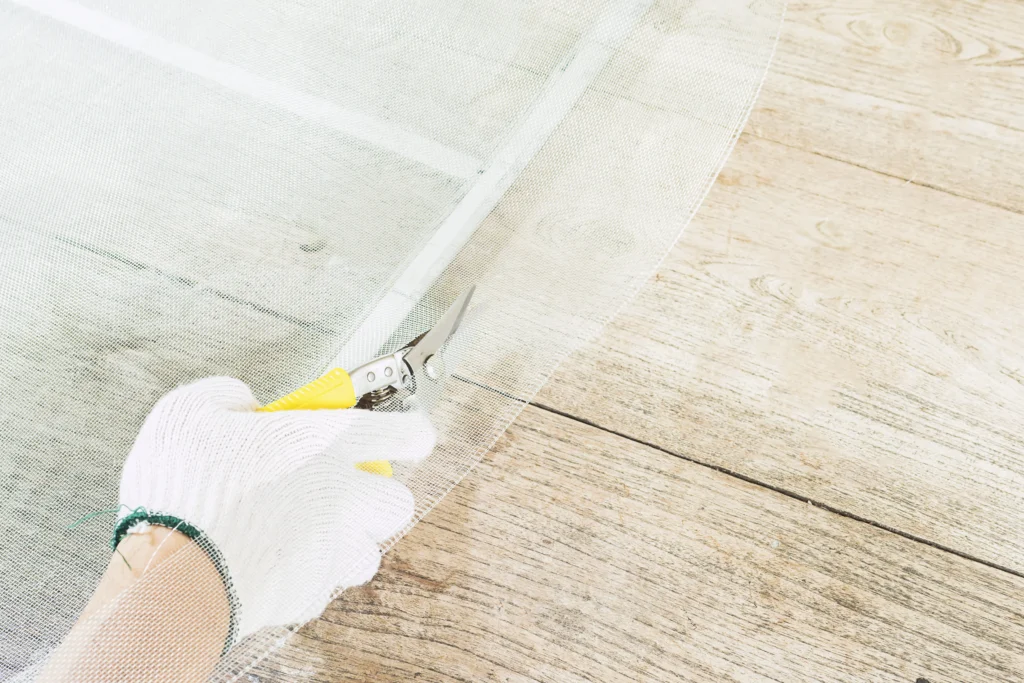
4.On the other side of the rectangle, stretch the mosquito netting and staple it to the wood. Trim the excess fabric.
5.Turn it over and with pliers place the hooks, one in each corner. This will help secure and move the mosquito net easily.
https://youtu.be/o1-F9Ge_A_o?si=KbASKJbs8dhMmgG1
Do you want to protect your home from insects without sacrificing visibility?
Dare to give a modern and functional touch to your mosquito nets with our high-quality transparent fabrics.
Other tutorials

Sweet and Safe Protection: Crib Mosquito Net to improve your baby’s sleep
The first months of a baby’s life are precious, but they also come with challenges, like protecting them from bugs while they sleep. Crib mosquito nets are a simple and effective solution to keep mosquitoes and other insects away, allowing your little one to rest peacefully.
Materials:
- In this case we use a Lill voile curtain 280 cm by 300 cm (You can also use Tulle Fabric per meter)
- Thick ribbon or a piece of fabric (5 cm wide) the same length as the curtain
- Sewing machine (Optional)
- Ring
- Rope
- Wooden bead
- Tape measure
- Pins
To decorate: (Optional)
- 2 bouquets of artificial flowers
- Hot silicone
- Battery-powered lights (Important: LED)
Create your own mosquito nets so that your baby sleeps peacefully without worrying about these insects. Buy your materials today!
No se han encontrado productos.
No se han encontrado productos.
Step by step: How to make a crib mosquito net
1.Join the two curtains, check that the seam of the curtains is on both sides. Leave that space in the openings that already come with the curtains, this will help later to pass a rope.
2.Start by sewing underneath the openings to the end of the curtains (this will be the back of the crib mosquito net).
3.With a tape measure, mark 50 cm from the top of the curtain, with pins place the piece of fabric (5 cm wide) at that distance across the entire width of the curtains. Sew on one side (zigzag stitch) remembering to leave the opening at the beginning and at the end (to be able to pass the mosquito net ring through); In the same way, repeat this step on the other side.
Remember: the hoop you must use must have an opening to be able to pass it through the tunnel you created with the fabric.
4.For the front piece of the mosquito net, sew from the top to the beginning of the fabric opening where you traced the 50 cm.
5.Then pass the hoop from end to end through the openings in the fabric. Then join the hoop with tape and hand sew the openings, giving your mosquito net a cleaner touch.
6.Through the opening at the top, pass a thick rope (you can use a pen to pull it)
7.Use another piece of rope with a wooden basin (large) to make the center of the mosquito net so you can hang it from the ceiling. After placing the basin inside the center, tighten the ropes that you passed through the opening, tie several knots so that it does not come out and cut the excess rope (to decorate you can add some basins to the rope in the center).
8.When hanging the mosquito net, you can cut off the excess that sticks to the floor.
Decoration: Artificial flower hoop (optional)
1.Disassemble the two bouquets of artificial flowers, separate the flowers from the branches with the leaves.
2. With the branches make a long crown, and join the ends with silicone.
3.Place the flowers on top and play with them until you are satisfied with the result, glue them with silicone.
4.If you wish, you can add battery-operated lights interspersed throughout the flowers.
5.To put it in the mosquito net: make sure it is already hanging from the ceiling. Place the flower crown on the entire ring part of the mosquito net and on the back join the ends of the crown to close it.
https://youtu.be/j8Ox6PU7nBI?si=mjlq-66qx6t7UoPA
More tutorials
Sleep peacefully with a Bed Mosquito Net for a Restful Sleep
A bed net is crucial to protect against mosquito bites at night, especially in areas where mosquito-borne diseases are common. In addition to providing protection, it can also add a decorative touch to the room.
Materials:
- Mesh cloth (mosquito net cloth)
- Embroidery hoop or wooden hoop (the size will depend on the dimensions of your bed and how much you want the mosquito net to hang)
- Ceiling hanging hook (optional)
- Thread and needle or sewing machine
- Tape measure
- Scissors
In our store you will find all the materials you need for your own mosquito net. Don’t wait any longer and place your order now!
No se han encontrado productos.
No se han encontrado productos.
Nights Without Buzz! How to Make a Bed Mosquito Net Step by Step
1.Measure the circumference of your bed and add a few extra centimeters to allow for draping. Cut the mosquito netting according to the measurements you took.
2.Fold the edges of the fabric and sew them to prevent fraying, if you are using a sewing machine you can choose to hem them for a cleaner, more durable finish.
3.If you are using an embroidery hoop, separate the hoop and slide the fabric over the outer hoop. Then, place the inner ring and adjust them. If you prefer a wooden hoop, simply wrap the fabric around the hoop and secure with pins or fabric glue.
4.Place the hoop over the top of your bed, making sure it is centered.
Extra tutorials
How to clean a mosquito net
Mosquito nets are an invaluable tool to protect our homes and spaces from annoying insects, but for them to perform their function effectively, it is important to keep them clean and in good condition.
In addition, knowing how to glue the mosquito netting is essential to repair any damage or tears that may compromise its effectiveness. Below we provide you with an informative guide on how to clean a mosquito net and how to glue the mosquito net cloth properly.
1.Disassemble the mosquito net from the window or door carefully. If possible, take the mosquito net outdoors to clean it.
2.Gently tap the mosquito net to remove dust and loose debris. You can use a soft brush to help loosen dirt.
3.Fill a bucket with warm water and add a mild detergent. Dip the mosquito net into the soapy solution and use a sponge or soft cloth to gently rub the fabric, paying special attention to the dirtiest areas.
4.Once you have removed the dirt, rinse the mosquito net with clean water to remove any soap residue.
5.Place the mosquito net in a ventilated place and let it air dry completely before putting it back in place.
What is the mosquito net glued with?
The mosquito netting can be glued or fixed in different ways, depending on the preference and needs of each person. One of the most common options is to use special double-sided adhesive tape for textiles, which allows a firm and long-lasting hold without damaging the fabric.
Another alternative is the use of textile glue, which guarantees a strong and flexible bond between the mosquito net fabric and the frame or surface where it will be placed. You can also choose to use staples or special nails for fabric if you want a more robust fixation.
Ultimately, the choice of fixing method will depend on personal preferences and the type of surface where the mosquito net will be installed.
Protect your home from insects safely and effectively!
No se han encontrado productos.
Recommendations for you